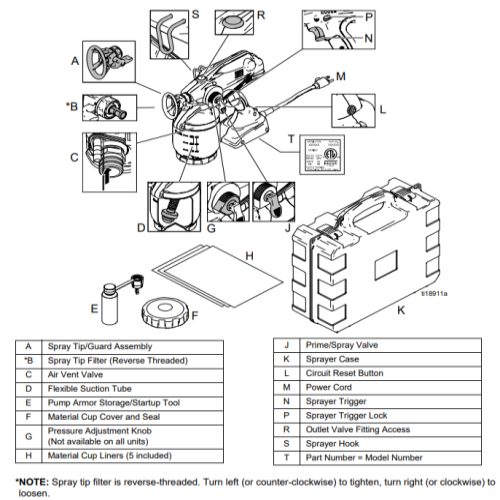
TrueCoat Plus II Home Center - 16N660
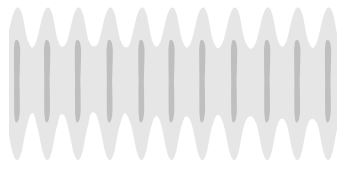
Slow speed of movement.
Unclog spray tip or clean spray tip filter, page 15.

Turn up pressure control knob
See Choosing the Correct Tip, page 13.
Switch to compatible material.
See Outlet Valve Fitting Repair, page 24 and Inlet Valve Fitting Removal/Service, page 23.
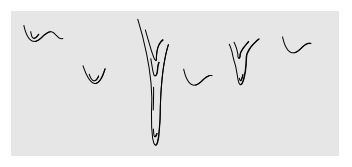
Move sprayer faster while spraying.
Move sprayer away from surface 10 in. (25 cm)
Release trigger when changing directions.
See Reversible Spray Tip Selection Chart, page 13.
Turn down pressure control knob
Replace spray tip. See Install Spray Tip/Guard Assembly, page 14.
Move sprayer away from surface 10 in. (25 cm)
Install different size spray tip. See Reversible Spray Tip Selection Chart, page 13.
See Install Spray Tip/Guard Assembly, page 14.
Move sprayer closer to surface.
Install different size spray tip. See Reversible Spray Tip Selection Chart, page 13.
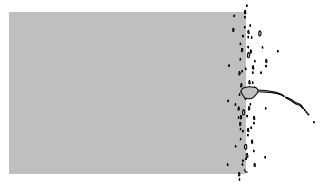
See Shutdown and Cleaning, page 16.
Clean or replace spray tip filter. See page 15.
See Install Spray Tip/Guard Assembly, page 14.
Replace spray tip/guard assembly.
Spray tip filter is partially clogged or damaged. Clean or replace filter. See page 15.
Spray tip/guard assembly not threaded completely onto sprayer. See Install Spray Tip/Guard Assembly, page 14.
Seat is worn. Replace spray tip/guard assembly.
If the three solutions above do not solve the problem, replace needle assembly.
Disengage trigger lock. See page 8.
Replace with charged battery and place old battery in charger, or allow battery to warm up.
Allow battery to cool.
Install battery or replace.
Replace motor/control board kit.
Prime the pump. See Starting a New Job (or Refilling the Material Cup), page 12.
Use pump access armor storage/startup tool to clear pump of debris. See Storage, page 18.
Clean air vent holes or the air vent valve as your model is equipped. See Shutdown and Cleaning, page 16.
Put valve DOWN to spray position.
Make sure Flexible Suction Tube is properly installed, page 10.
See Shutdown and Cleaning, page 16.
Replace flexible suction tube o-rings.
Replace flexible suction tube.
Turn spray tip to SPRAY position.
See Unclogging Spray Tip/Guard Assembly, page 15.
Remove and clean spray tip filter. See Unclogging Spray Tip/Guard Assembly, page 15.
Turn pressure control knob up.
Make sure material cup is filled with material. Rotate flexible suction tube, page 10. Do not tilt the material cup too far. Prime the pump. See Starting a new Job (or Refilling the Material Cup), page 12.
Refill material cup with material and prime the pump.
Use pump access armor storage/startup tool to clear pump of debris. See Storage, page 18. If unsuccessful, see Inlet Valve Fitting Removal/Service, page 23.
See Outlet Valve Fitting Repair, page 24 and Inlet Valve Fitting Removal/Service, page 23.
Replace needle assembly.
See Unclogging Spray Tip/Guard Assembly, page 15.
Rotate spray tip to SPRAY position.
See Reversible Spray Tip Selection Chart, page 13.
Clean or replace spray tip filter. See page 15.
Clean or replace flexible suction tube. See page 16.
Replace spray tip. See Install Spray Tip/Guard Assembly, page 14.
Do NOT shake material. Stir the material or check the manufacturer’s recommendation for the material being sprayed.
Turn up pressure control knob.
Warm material.
See Outlet Valve Fitting Repair, page 24 and Inlet Valve Fitting Removal/Service, page 23.
Turn pressure control knob down.
Pump has reached its maximum life.
Replace pump.
Damaged battery.
Replace battery.
Battery life varies with material, spray tip size, pressure, and speed setting.
See Battery and Charger, page 6.
Hot charging environment or damaged battery.
See Battery and Charger, page 6. Unplug charger from outlet for 10 seconds to reset charger status indicator light. Attempt to charge again. If problem persists, move charger to cooler environment or replace battery.
Sprayer is working properly.
The issue is resolved. Strain your paint to avoid further issues.
Flush the sprayer with hot soapy water or 100% mineral spirits.
If this still does not resolve the issue the fluid pump may need to be replaced.
You will need to create a Salesforce case to escalate the call to a Graco Tier II tech.
Please advise the customer they will be contacted back by a Tier II Technician
• Check to make sure that the cup is securely attached to the sprayer.
• Make sure there is an "O" ring on the inlet of the sprayer.
• Check to make sure all of the air has been pushed out of the flexliner before spraying.
• Make sure the VacuValve is closed tightly.
There is an air leak.
• Check to make sure that the cup is securely attached to the sprayer.
• Make sure there is an "O" ring on the inlet of the sprayer.
• Check to make sure all of the air has been pushed out of the flexliner before spraying.
• Make sure the VacuValve is closed tightly.
Fluid pump may need to be replaced.
You will need to create a Salesforce case to escalate the call to a Graco tier II tech.
Please advise the customer they will be contacted back by a Tier II Technician.
