Ultimate MX Cordless - 17N222
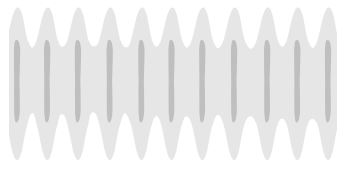
Slow speed of movement.
Unclog spray tip or clean spray tip see Clear Tip Clog, page 17.
Increase speed until desired pattern is achieved.
Hold sprayer farther away from surface.
Switch to different spray tip. See Tip and Pressure Selection, page 15.
Remove two pump plugs and front valve to gain access to the three outlet valves, see Cleaning Outlet Valves, page 29. Clean outlet valves. Replace if necessary.
Replace pump assembly.
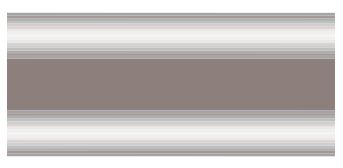
Increase speed until desired pattern is achieved.
Thin material follow paint manufacturer’s recommendations.
Install different size spray tip. See Tip and Pressure Selection, page 15.
Switch material.
Replace spray tip. See Spray Tip Installation, page 24.
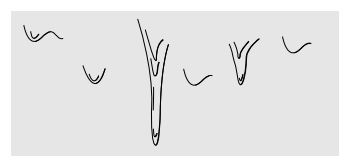
Move sprayer faster while spraying.
Move sprayer away from surface 10 in. (25 cm)
Release trigger when changing directions.
Decrease speed until desired pattern is achieved.
Replace spray tip. See Spray Tip Installation, page 24.
Move sprayer away from surface 10 in. (25 cm)
Install different size spray tip. See Spray Tip Installation, page 24.
Replace spray tip. See Spray Tip Installation, page 24.
Move sprayer closer to surface.
Install different size spray tip. See Spray Tip Installation, page 24.
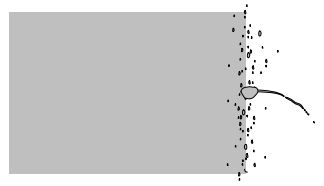
Clean spray tip guard. See Clear Tip Clog, page 17.
See Spray Tip Installation, page 24.
Replace spray tip. See Spray Tip Installation, page 24.
Replace front valve assembly.
Replace spray tip. See Spray Tip Installation, page 24.
See Spray Tip Installation, page 24.
Spray tip seal and seat are damaged or not properly installed.
See Spray Tip Installation, page 24.
• Prime the pump. See Starting a New Job, page 12.
• Make certain there is only one FlexLiner in the cup support.
• Make certain the cup cover is properly threaded to the cup support. If threads are visible below the cup cover when tight, fully remove and reinstall to the cup support so no threads are visible when tight.
• Make certain the cup cover is tightened to cup support so the arrow on cup cover is within range of indicator on cup support. • Make certain the cup assembly is properly locked on the sprayer.
• Make certain all the air is out of the FlexLiner and the VacuValve is properly closed.
• Clean VacuValve reservoir and air hole. See Cleaning VacuValve, page 22.
• Clean Sprayer. See Cleanup, page 19.
• Outlet valves are not installed properly. See Cleaning Outlet Valves, page 29.
Turn Prime Pump/Spray knob forward to SPRAY position.
Turn spray tip to SPRAY position.
See Clear Tip Clog, page 17.
See Strain the Paint, page 12.
Increase speed until unit sprays.
Refill FlexLiner with material and prime the pump. See Refilling FlexLiner, page 14.
See step 16 on page 22.
Replace pump assembly.
Replace pump and/or motor assembly.
See Clear Tip Clog, page 17.
Rotate spray tip to SPRAY position.
Install different size spray tip. See Tip and Pressure Selection, page 15.
Replace spray tip. See Spray Tip Installation, page 24.
Do NOT shake material. Stir the material or check the manufacturer’s recommendation for the material being sprayed.
Warm material.
Remove two pump plugs and front valve to gain access to the three outlet valves. Clean outlet valves, see Cleaning Outlet Valves, page 29. Replace if necessary.
Replace pump assembly.
Pump has reached the end of its life.
Replace pump assembly.
Cup not properly seated.
• Make certain that there is only one FlexLiner in cup support.
• Make certain the cup cover is properly threaded to the cup support. If threads are visible below the cup support when tight, fully remove the cup cover and reinstall to the cup support so no threads are visible when tight.
• Make certain the cup cover is tightened to the cup support so the arrow on the cup cover is within range of the indicator on the cup support.
• Avoid flexing or pushing on the cup support when you evacuate the air out of the FlexLiner.
• Avoid pulling down on the FlexLiner when you evacuate the air out of the FlexLiner.
• Make certain there is no damage to the FlexLiner lip or the cup cover gasket.
• Make certain that the FlexLiner lip and cup cover gasket is free of debris and dried paint.
• Replace FlexLiner.
Sprayer is working properly.
The issue is resolved. Strain your paint to avoid further issues.
Flush the sprayer with hot soapy water or 100% mineral spirits.
If this still does not resolve the issue the fluid pump may need to be replaced.
You will need to create a Salesforce case to escalate the call to a Graco Tier II tech.
Please advise the customer they will be contacted back by a Tier II Technician
• Check to make sure that the cup is securely attached to the sprayer.
• Make sure there is an "O" ring on the inlet of the sprayer.
• Check to make sure all of the air has been pushed out of the flexliner before spraying.
• Make sure the VacuValve is closed tightly.
There is an air leak.
• Check to make sure that the cup is securely attached to the sprayer.
• Make sure there is an "O" ring on the inlet of the sprayer.
• Check to make sure all of the air has been pushed out of the flexliner before spraying.
• Make sure the VacuValve is closed tightly.
Fluid pump may need to be replaced.
You will need to create a Salesforce case to escalate the call to a Graco tier II tech.
Please advise the customer they will be contacted back by a Tier II Technician.
