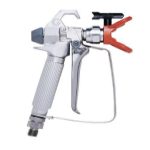
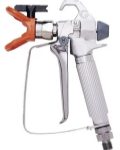
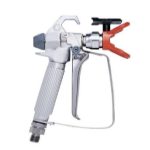
Magnum Airless Guns

To avoid serious injury follow all warnings and instructions in the manual. Wear appropriate personal protective equipment.
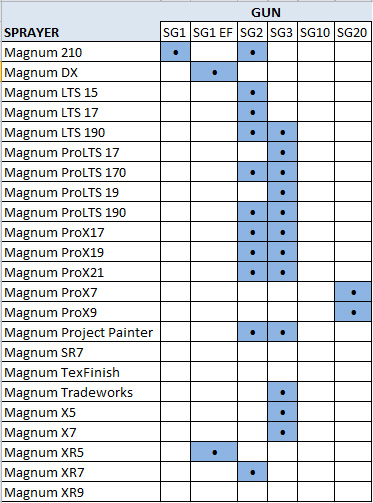
Which Gun Goes With Each Sprayer
NOTE: Any SG gun will work with any Magnum sprayer.
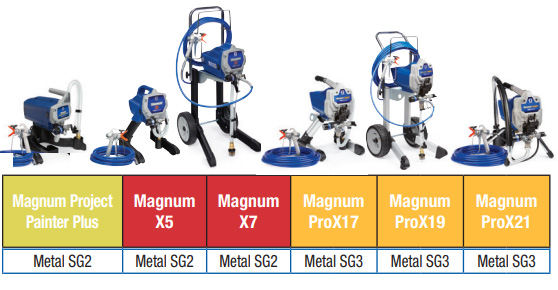

Gun and Sprayer Chart
The guard you are trying to use may not have the proper threads or are damaged, which is not allowing it to screw onto the gun.
You will need to replace it with one of the following.
Blue guard part number 246215
Orange guard part number 243161
The tip may be clogged.
- reverse the tip and spray into a waste bucket for one second, turn the tip to spray and try spraying.
the filter in the gun may be clogged.
- Relieve pressure and remove gun handle to inspect the filter, replace if clogged.
If this does not fix it, you will need to submit a Salesforce case for Manager Review.
Please advise the customer they will be contacted back by a Tier II Technician.
There are several causes:
1. The needle is held open with debris.
2. The grey nut at the back of the gun is turned too tight, loosen it slightly.
3. The needle may be worn and needs to be replaced. Have the gun serviced or install a new repair kit for the specific gun you are using.
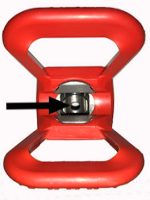
Release pressure on the sprayer and remove the guard from the gun.
- Remove the tip from the guard
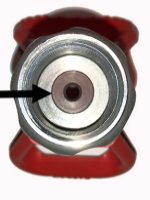
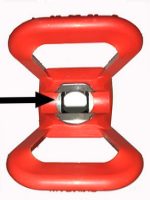
- Make sure that there is a "One Seal" installed in the guard. (See Images below)
- Make sure the rubber seal is in place, the seal is a two part seal, one is metal and the other is rubber.
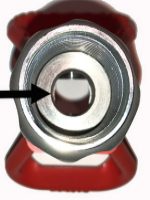
- If there is a large hole in the guard there is not a seal installed
The seal comes with each new tip (see "How to Change The One Seal" video below)
If this does not fix it, you will need to submit a Salesforce case for Manager Review.
Please advise the customer they will be contacted back by a Tier II Technician.
Front of Guard
Rear of Guard
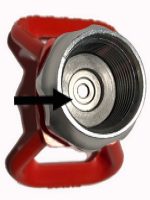
Seal Removed

Seal Not Installed Front
Seal Not Installed Rear
Gasket Missing
This video has music playing so if you are on the phone, adjust the video volume.
Copy this link to email
https://players.brightcove.net/940277650001/SkvHkNG7_default/index.html?videoId=6038629780001
1. Tip is partially plugged. Reverse the spray tip and trigger the gun to clear clog per instructions in your manual. Remove and clean the tip, but do not use any metal objects to clean it with because the tip carbide could be chipped and damaged.
2. Pressure switch is set too low. Increase pressure by turning the knob clockwise.
3. Filters in sprayer or gun are plugged. Remove and clean the filters or replace as needed.
4. Tip is too large or worn out. Replace the tip with proper size for the material being sprayed and within the rated tip size of the sprayer.
5. Material is too thick. Let the paint warm to room temperature if the paint is cold or thin the paint according to the manufacturers instructions.
6. Paint hose is too long and/or too small diameter. Use shorter and/or larger diameter hose.
If the problem is not resolved, You will need to submit a Salesforce case for Manager Review. Please advise the customer they will be contacted back by a Tier II Technician
1. Pattern surging could be caused by a plugged or excessively worn tip. Clean or replace with a new tip.
2. Pulsating fluid delivery could be the result of using too large of a tip for the sprayer or using an excessively worn tip. Change to a smaller tip or replace worn tip with a like size new tip.
3. A shrinking spray pattern could be caused by restricted filters or screens. Remove and clean or replace all filters and inlet screen in the system. Filters can be located in the gun, pump manifold and on the suction tube.
If this does not fix it, you will need to submit a Salesforce case for Manager Review.
Please advise the customer they will be contacted back by a Tier II Technician.
Streaks in the spray pattern, especially heavy bands at the outside edge, is an indication of low pressure at the tip. Turn up the pressure control knob until these bands are eliminated. If the sprayer is already at maximum, you may have to use larger diameter hose or shorten the length of the hose to reduce the pressure drop. Also, make sure any paint filters in the system are clean, because there will be a pressure drop across a restricted or plugged screen.
Sprayers are rated for a maximum tip size. Using a tip that is larger than the maximum size or a tip that is worn larger will cause low pressure. The tip should also be the proper size for the type of material being sprayed.
The material may be too thick. Warm the material to room temperature or thin per the material manufacturer recommendations.
If this does not fix it, you will need to submit a Salesforce case for Manager Review.
Please advise the customer they will be contacted back by a Tier II Technician.
As an airless tip wears, two things change. The fan length gets shorter and the hole size gets larger. The end result is a more oval pattern than a long, thin line. Spray a test pattern with a new spray tip and keep it for a reference. Check your fan pattern versus this test pattern and replace the tip when the fan size has collapsed 25% of its original size. Increased paint consumption will also indicate a worn tip.
If this does not fix it, you will need to submit a Salesforce case for Manager Review.
Please advise the customer they will be contacted back by a Tier II Technician.
- RAC IV, RAC V and TruAirless tips are interchangeable; they require the Orange Spray Guard.
- RAC X, FFLP/LP tips are interchangeable, with the proper seal assembly installed. They require the Blue Spray Guard.
- RAC IV, RAC V and TruAirless tips use the same seal assembly.
- RACX and FFLP/LP tips have a unique seal assembly.
Seal assemblies are not interchangeable between the two.
NOTE: The proper seal assembly is included in every tip package and should be changed every time a new tip is installed. Use of the wrong seal assembly can cause inadequate tip sealing and poor spray results.
Graco makes spray tips for every type of job. All are manufactured with the highest quality tungsten carbide, tested for flow rate, and liquid-honed for longer life. Reverse-A-Clean® (RAC) tips are designed for easy tip unplugging and quick tip changes.
The chart below summarizes the range of tips and their part number code.
Part Numbers
286XXX - RAC 5 SwitchTip (Mainly sold in the home center market) Has been replaced with the TRUEairless tip
221XXX - RAC IV SwitchTip (Sold in the Home center market)
FFTXXX - Fine Finish RAC Tip (Sold in the professional market) Replaced with the FFLP
LL5XXX - LineLazer RAC Tip (Sold in the pavement market)
LPXXX - Low Pressure tip (Sold in the professional market)
FFLPXXX - Fine Finish Low Pressure Tip (Sold in the professional market)
TRUXXX - TRUEairless tip (Sold in the home center market)
TCPXXX - Used in the handheld sprayers (with the exception of the 360, they use PN 17A223)
GHDXXX - Heavy-Duty RAC Tip (Sold in the Roofing Market)
TRUEairless Tip - This tip is now shipped with all SG guns and new Magnum sprayers.
- Ideal for remodeling contractors, DIYers and Homeowners
- Softspray Technology makes it easier to achieve a professional finish by delivering a softer spray pattern to easily blend each spray pass
- Experience less prep and clean-up time with reduced overspray
- Ability to spray the thickest paints at the lowest possible pressure
- Reverse-A-Clean design makes it easy to clear tip clogs
- Magnum sprayers include a 515 TrueAirless spray tip, just one of 16 available TrueAirless tip sizes